Installation Guide
Installing the CDN Manager with the deploy command
Overview
The CDN Manager is installed with deploy, a command on the installation ISO. You describe your machines and your site in a few files on the first machine, and deploy does the rest over SSH: it configures each machine’s firewall and network, builds the Kubernetes (k3s) cluster, installs the CDN Manager, and checks that it is healthy.
deploy is the only supported way to install the CDN Manager. Running the ISO’s install, join-server and join-agent scripts by hand is no longer supported.
New here? Start with the Quickstart. It walks you through a complete installation on three machines, from minimal operating system installs to signing in to the GUI. The other pages cover the details and the variations.
Upgrading from 1.6 or earlier? Version 1.8 cannot be installed over an earlier release. Install it on a new cluster. See the Upgrade Guide.
How It Works
flowchart LR
    A[Mount the ISO<br>on the first server] --> B[deploy init]
    B --> C[Edit /etc/acd/deploy]
    C --> D[deploy]
D --> E[Sign in to the GUI]- Mount the ISO on the machine that will be the first server.
- Run
deploy init once. It installs Ansible and creates the configuration folder /etc/acd/deploy. - Edit the configuration: the machines and their roles, your site settings, and optionally a TLS certificate, MaxMind databases and application settings.
- Run
deploy. It checks everything first, takes a backup, then installs or updates the cluster to match your configuration.
To change anything later, edit the configuration and run deploy again. Every run is safe to repeat.
Guides
Prerequisites
- Machines meeting the System Requirements: three servers for production, optionally with agents for extra capacity. A single server is enough for a lab.
- Operating system: a minimal install of Red Hat Enterprise Linux 9.4 or later, or a compatible rebuild, with firewalld and NetworkManager running.
- Network: a default route on every machine and, optional but recommended, a backplane network, separate from the public network, that all the machines are reachable on. See the Networking Guide.
- Access: passwordless root SSH from the first server to every machine, itself included.
- Software: the installation ISO from the AgileTV customer portal, and
dnf access to the operating system’s repositories on every machine. - Recommended: a TLS certificate from a trusted certificate authority, and MaxMind GeoIP databases from your own MaxMind subscription.
Getting Help
- Installation Troubleshooting lists every failure code
deploy reports. - If the final health check fails,
deploy writes /etc/acd/deploy/support-bundle-acd.tar.gz. Send it to AgileTV support. - The Release Notes list known issues for each version.
1 - Quickstart
From three minimal Enterprise Linux 9 machines to a working CDN Manager cluster
Overview
This guide takes three freshly installed Enterprise Linux 9 machines and turns them into a production CDN Manager cluster, ending with you signed in to the web GUI. Follow it from top to bottom. Each step shows the commands to run and the output to expect, and links to a page with the details and the alternatives.
The whole installation is driven by one command, deploy, which ships on the installation ISO. You run it on the first machine, and it configures every machine over SSH: the host firewall and network, the Kubernetes cluster, and the CDN Manager itself. You do not run anything by hand on the other machines.
Estimated time: about 30 minutes, of which deploy itself takes 15 to 20.
The example cluster
The commands below use this example. Replace the names and addresses with your own as you go.
| Machine | Role | Public address (eth0) | Backplane address (eth1) |
|---|
manager-1 | server | 192.0.2.11 | 10.10.0.11 |
manager-2 | server | 192.0.2.12 | 10.10.0.12 |
manager-3 | server | 192.0.2.13 | 10.10.0.13 |
- Manager hostname:
manager.example.com, the name users and CDN Directors use to reach the manager. Its DNS record points at the public address of one or more of the machines. - Backplane network:
10.10.0.0/24, the network the machines use to talk to each other. A backplane is optional, but recommended. When you use one, all node-to-node (east-west) traffic stays on it, and every machine must be reachable on it. It should be a separate network from the public one. It does not have to be reserved for the cluster, so other hosts may also be on it. - CDN Director:
director-1 at 192.0.2.201. It runs on its own machine, outside this cluster.
Single network? A dedicated backplane is recommended, but not required. If each machine has only one network interface, follow the guide as written and leave backplane_network empty in Step 6. See the Networking Guide for both layouts.
Before You Begin
Make sure you have:
- Three machines that meet the System Requirements, each with a minimal install of Red Hat Enterprise Linux 9.4 or later, or a compatible rebuild such as Oracle Linux, AlmaLinux or Rocky Linux. Keep the defaults: firewalld and NetworkManager running, and any SELinux mode.
- Final hostnames on every machine, each one unique. A machine cannot be renamed after it joins the cluster.
- A default route on every machine, on the public interface. It does not need to lead to the internet: on an isolated network, use your site’s router or any gateway address on that subnet.
- Root access to every machine, by password or key, to set up SSH in Step 1.
- Package repositories: every machine must be able to install packages with
dnf from the operating system’s repositories. deploy installs a few packages, such as ansible-core on the first machine and the storage tools on all of them. Without internet access, see Air-Gapped Installation. - A DNS name for the manager, such as
manager.example.com. - The installation ISO,
esb3027-cdn-manager-1.8.0.iso, from the AgileTV customer portal. - A TLS certificate for the manager hostname, issued by a certificate authority your users trust, with its private key. You can start without one; see Step 7.
- MaxMind GeoIP databases from your own MaxMind subscription: City, ASN and Anonymous IP. You can start without them; see Step 8.
Run every command in this guide as root on manager-1, unless a step says otherwise.
Step 1: Set Up SSH Keys
deploy connects from manager-1 to every machine as root, manager-1 itself included, and needs to log in without a password prompt.
Create a key on manager-1:
ssh-keygen -t ed25519 -N '' -C "acd-deploy@$(hostname)" -f /root/.ssh/id_ed25519
Expected output:
Generating public/private ed25519 key pair.
Your identification has been saved in /root/.ssh/id_ed25519
Your public key has been saved in /root/.ssh/id_ed25519.pub
The key fingerprint is:
SHA256:igFCBNWbW74iWVSPZdMrGhtpKXiPQedvUZEGPmzppsI acd-deploy@manager-1
...
Copy it to all three machines. Enter each machine’s root password when prompted:
for ip in 192.0.2.11 192.0.2.12 192.0.2.13; do
    ssh-copy-id -o StrictHostKeyChecking=accept-new -i /root/.ssh/id_ed25519.pub root@$ip
done
Expected output, once per machine:
/usr/bin/ssh-copy-id: INFO: Source of key(s) to be installed: "/root/.ssh/id_ed25519.pub"
/usr/bin/ssh-copy-id: INFO: attempting to log in with the new key(s), to filter out any that are already installed
/usr/bin/ssh-copy-id: INFO: 1 key(s) remain to be installed -- if you are prompted now it is to install the new keys
root@192.0.2.11's password:

Number of key(s) added: 1
Check that each login now works without a prompt:
for ip in 192.0.2.11 192.0.2.12 192.0.2.13; do
    ssh -o BatchMode=yes root@$ip hostname
done
Expected output:
manager-1
manager-2
manager-3
If a machine asks for a password or prints Permission denied, fix that before going on. Otherwise deploy stops with UNREACHABLE.
Step 2: Check the Machines
Confirm that each machine runs a supported release, has its addresses and default route, and runs firewalld and NetworkManager:
for ip in 192.0.2.11 192.0.2.12 192.0.2.13; do
    echo "===== $ip"
    ssh root@$ip 'cat /etc/redhat-release; ip -br -4 addr; ip route show default; systemctl is-active firewalld NetworkManager'
done
Expected output, for each machine:
===== 192.0.2.11
Red Hat Enterprise Linux release 9.4 (Plow)
lo               UNKNOWN        127.0.0.1/8
eth0             UP             192.0.2.11/24
eth1             UP             10.10.0.11/24
default via 192.0.2.1 dev eth0 proto static
active
active
Check for:
- A release of 9.4 or later.
- The default route on the public interface (
eth0). - The backplane address on another interface (
eth1), inside the backplane network. active twice: firewalld, then NetworkManager.
deploy checks all of this again before it changes anything, along with processor cores, memory and kernel modules, and stops with a message naming the problem.
Step 3: Mount the Installation ISO
Copy the ISO to manager-1, for example with scp from your workstation:
scp esb3027-cdn-manager-1.8.0.iso root@192.0.2.11:/root/
Then, on manager-1, mount it at /mnt/esb3027:
mkdir -p /mnt/esb3027
mount -o loop,ro /root/esb3027-cdn-manager-1.8.0.iso /mnt/esb3027
ls -1 /mnt/esb3027
Expected output:
ansible
BUILD_ARCH
charts
common.sh
deploy
install
join-agent
join-server
k3s_installer.sh
load-maxmind-databases
openapi.yaml
Packages
rootfs.tar
values-lab.yaml
values-production.yaml
values.yaml
VERSION.txt
The ISO is needed only on manager-1. deploy copies what the other machines need.
Important: Keep the ISO mounted at /mnt/esb3027 whenever you run deploy, now and later. The deployment’s configuration reads its application settings from the ISO, and deploy stops if the ISO is not mounted. The mount does not survive a reboot, so mount it again before the next run.
Step 4: Initialize the Deployment
Initialize manager-1 with the production preset:
/mnt/esb3027/deploy init prod
This installs ansible-core from the operating system’s repositories, installs the Ansible collections bundled on the ISO, and creates the configuration folder /etc/acd/deploy. Expected output (the package list is shortened here):
###############################################################
            ESB3027 AgileTV CDN Manager -- Deployer
 Version: 1.8.0
###############################################################

Installing ansible-core from the OS repositories ...
Dependencies resolved.
================================================================================
 Package               Arch    Version                 Repository          Size
================================================================================
Installing:
 ansible-core          x86_64  1:2.14.18-3.el9         appstream          3.9 M
...
Complete!
Installing bundled Ansible collections ...

Initialization complete, using the production preset. Next:
  1. Edit /etc/acd/deploy/inventory.ini        - your node addresses and roles.
  2. Edit /etc/acd/deploy/group_vars/all.yaml  - at minimum, manager_hostnames.
  3. (Optional) drop a TLS certificate + key into /etc/acd/deploy/certs/
     and the three MaxMind .mmdb files into /etc/acd/deploy/maxmind/.
  4. (Optional) change application settings in /etc/acd/deploy/values.override.yaml.
  5. Run: /mnt/esb3027/deploy

See /etc/acd/deploy/README.md for the full input contract.

WARNING: deploy connects over SSH from this node to every node in
inventory.ini, this node included, as root unless ansible_user says
otherwise. Make sure SSH keys are set up so each of those logins works
without a password prompt before running deploy.
The next four steps follow that list. Everything you configure lives in /etc/acd/deploy:
/etc/acd/deploy/
├── inventory.ini          # Step 5: your machines and their roles
├── group_vars/all.yaml    # Step 6: your site settings
├── certs/                 # Step 7: your TLS certificate and key
├── maxmind/               # Step 8: your MaxMind databases
├── values.override.yaml   # optional application settings, empty to start
├── preset.yaml            # link to the production preset on the ISO; do not edit
└── README.md              # the full reference for this folder
certs/ and maxmind/ each start with a README.txt: short instructions for that folder, which deploy ignores. Leave it there or delete it.
For other options, such as the lab preset, see the deploy reference.
Step 5: List Your Machines
Open /etc/acd/deploy/inventory.ini in an editor. It is a commented example with three sections. Edit the machine lines so that your three machines are listed under [server], with the address deploy reaches each one on over SSH, and the other two sections are empty:
[server]
manager-1 ansible_host=192.0.2.11
manager-2 ansible_host=192.0.2.12
manager-3 ansible_host=192.0.2.13

[agent]

[director]
[server]: the first server listed must be the machine you run deploy on, here manager-1. The number of servers must be odd: one for a lab, three for production.[agent]: lists any additional machines beyond the three servers. It may be left empty, as here.[director]: leave it empty. CDN Directors run on their own machines and are listed in the next step.
To add agent machines later, or to set per-machine options, see Inventory.
Step 6: Enter Your Site Settings
Open /etc/acd/deploy/group_vars/all.yaml. Every setting in it is explained in its comments and already holds a working default. For this cluster, change three lines:
manager_hostnames: [manager.example.com]
external_directors: [{name: director-1, address: 192.0.2.201}]
backplane_network: "10.10.0.0/24"
| Setting | What to enter |
|---|
manager_hostnames | Every hostname users and CDN Directors use to reach the manager. The first one is the main hostname: it must match your TLS certificate, and it is the only name you can sign in under. |
external_directors | Each CDN Director, with a name of your choosing and its IPv4 address (not its hostname). Leave the list empty, [], if you have none yet. |
backplane_network | The address range of the backplane network, which should be separate from the public network. Leave it empty, "", if you have no backplane. |
To review your changes, print the settings without their comments:
grep -Ev '^\s*(#|$)' /etc/acd/deploy/group_vars/all.yaml
Expected output:
---
manager_hostnames: [manager.example.com]
manage_firewall: true
manage_routes: true
external_directors: [{name: director-1, address: 192.0.2.201}]
backplane_network: "10.10.0.0/24"
cluster_pod_cidr: 10.42.0.0/16
cluster_svc_cidr: 10.43.0.0/16
firewall_cluster_zone: acd-cluster
firewall_public_policy: acd-public
tls_cert_file: ""
tls_key_file: ""
maxmind_city_db: ""
maxmind_asn_db: ""
maxmind_anon_db: ""
backup_dir: /var/lib/acd/backups
Important: backplane_network, cluster_pod_cidr, cluster_svc_cidr, firewall_cluster_zone and firewall_public_policy are locked at the first installation. Changing one later means reinstalling the cluster, which starts empty: the PostgreSQL databases, Kafka’s messages and everything else stored in the cluster are lost unless you have backed them up. Check them now.
With manage_firewall: true, the default, deploy configures firewalld on every machine for you. The backplane interface is trusted for all traffic, and the public interface stays in firewalld’s public zone with only the ports the manager needs opened. Before you run deploy, make sure the public zone allows everything else you need on the public interface, SSH included: firewall-cmd --zone=public --list-all on each machine should list ssh under services.
For every setting, see Site Settings.
Step 7: Add Your TLS Certificate
Copy your certificate and its private key into /etc/acd/deploy/certs/:
cp manager-fullchain.crt manager.key /etc/acd/deploy/certs/
chmod 600 /etc/acd/deploy/certs/manager.key
- Both files must be PEM (text beginning with
-----BEGIN), in two separate files. The file names do not matter. - Use the full chain: your certificate followed by any intermediate certificates.
- The key must not have a passphrase.
- The certificate must cover the first entry of
manager_hostnames, directly or by a wildcard.
Check what the certificate covers:
openssl x509 -in /etc/acd/deploy/certs/manager-fullchain.crt -noout -subject -issuer -dates -ext subjectAltName
Expected output:
subject=CN = manager.example.com
issuer=CN = Example Issuing CA
notBefore=Oct 14 18:57:23 2026 GMT
notAfter=Jan 16 18:57:23 2027 GMT
X509v3 Subject Alternative Name:
    DNS:manager.example.com
deploy checks the certificate and key before it changes anything.
No certificate yet? Add nothing to the folder: its README.txt can stay. deploy then serves a temporary self-signed certificate, which browsers warn about. Add the real one later and run deploy again to replace it. For production, use a certificate from a certificate authority your users already trust. See TLS Certificates.
Step 8: Add Your MaxMind Databases
The manager uses MaxMind GeoIP databases for geographic routing. Copy the three .mmdb files from your MaxMind subscription into /etc/acd/deploy/maxmind/:
cp GeoIP2-City.mmdb GeoLite2-ASN.mmdb GeoIP2-Anonymous-IP.mmdb /etc/acd/deploy/maxmind/
ls -l /etc/acd/deploy/maxmind/
Expected output:
total 126236
-rw-r--r--. 1 root root      4382 Oct 14 18:57 GeoIP2-Anonymous-IP.mmdb
-rw-r--r--. 1 root root 121642973 Oct 14 18:57 GeoIP2-City.mmdb
-rw-r--r--. 1 root root   7609502 Oct 14 18:57 GeoLite2-ASN.mmdb
-rw-r--r--. 1 root root       400 Oct 14 18:57 README.txt
Files are matched by name: one containing City, one ASN and one Anon. Provide all three or none. With none, geographic routing is off until you add them and run deploy again. See MaxMind GeoIP Databases.
Step 9: Run the Deployment
Start the installation:
deploy works through fixed stages, and stops at the first problem with a message naming it:
- Gather inputs: reads every machine and works out the settings. Changes nothing.
- Preflight: checks the machines and your settings. Changes nothing.
- Backup: archives each machine’s configuration before any change.
- Host network: configures the firewall zones, routing rules and kernel network settings on each machine, then checks the result.
- Cluster: installs Kubernetes (k3s) on
manager-1, then joins the other servers one at a time. - Platform: installs the CDN Manager, loads the MaxMind databases, and runs a final health check.
The output is long. Shortened, it looks like this:
###############################################################
            ESB3027 AgileTV CDN Manager -- Deployer
 Version: 1.8.0
###############################################################

Running the operator playbook (log: /etc/acd/deploy/deploy.log) ...
[WARNING]: Collection ansible.posix does not support Ansible version 2.14.18

PLAY [Gather inputs - host probes, host network plans and k3s] *****************

TASK [Check that the node can be reached] **************************************
ok: [manager-1]
ok: [manager-3]
ok: [manager-2]
...
PLAY [Join or upgrade the other servers, one at a time] ************************
...
TASK [cluster : Join or upgrade this node with join-server] ********************
changed: [manager-2]
FAILED - RETRYING: [manager-2]: Wait for this server to become Ready (20 retries left).
FAILED - RETRYING: [manager-2]: Wait for this server to become Ready (19 retries left).
...
TASK [cluster : Wait for this server to become Ready] **************************
ok: [manager-2]
...
TASK [acceptance : Report the go verdict] **************************************
ok: [manager-1] => {
    "msg": "Deployment gate PASSED for cdn-platform. GeoIP is serving."
}
...
PLAY RECAP *********************************************************************
manager-1                  : ok=185  changed=28   unreachable=0    failed=0    skipped=106  rescued=0    ignored=0
manager-2                  : ok=116  changed=16   unreachable=0    failed=0    skipped=48   rescued=0    ignored=0
manager-3                  : ok=116  changed=16   unreachable=0    failed=0    skipped=48   rescued=0    ignored=0
The installation succeeded when you see Deployment gate PASSED and the recap shows unreachable=0 and failed=0 for every machine. Your other counts may differ.
Some lines look alarming but are expected:
FAILED - RETRYING: ... Wait for this server to become Ready: deploy polls each joining server until it is ready. Ten or more of these per server is normal.[WARNING]: Collection ansible.posix does not support Ansible version ...: harmless.[WARNING]: Could not match supplied host pattern, ignoring: acd_host_network_verify: harmless.
The whole run is also appended to /etc/acd/deploy/deploy.log.
If deploy stops, its message starts with a code in square brackets, such as [ACD-TLS-HOSTNAME]. Look the code up in Installation Troubleshooting, fix the cause, and run deploy again. Running it again is safe: it picks up where the cluster is and re-applies your settings.
Step 10: Verify the Cluster
Check that all three machines are Ready:
kubectl get nodes -o wide
Expected output (the columns right of EXTERNAL-IP are trimmed here):
NAME        STATUS   ROLES                AGE     VERSION        INTERNAL-IP   EXTERNAL-IP
manager-1   Ready    control-plane,etcd   12m     v1.35.0+k3s1   10.10.0.11    192.0.2.11
manager-2   Ready    control-plane,etcd   8m47s   v1.35.0+k3s1   10.10.0.12    192.0.2.12
manager-3   Ready    control-plane,etcd   6m3s    v1.35.0+k3s1   10.10.0.13    192.0.2.13
INTERNAL-IP is each machine’s backplane address, and EXTERNAL-IP its public address.
Check every component of the CDN Manager:
Every admin target should show ok under HEALTH, and every node yes under READY. acd-admin status exits 0 either way, so read the output. See acd-admin status for what each column means.
Check that the manager answers on its hostname:
curl https://manager.example.com/api/v1/health/ready; echo
Expected output:
Note: If your certificate was issued by a private certificate authority that this machine does not trust, add --cacert <your CA certificate> to the curl commands. If you started without a certificate, use -k instead.
If you listed a CDN Director in external_directors, check that the manager reaches it. The trailing slash is required:
curl -s -o /dev/null -w '%{http_code}\n' https://manager.example.com/confd/director-1/config/__active/
Expected output:
200 shows that the manager reached the Director and read its configuration. A 5xx status comes from the manager’s gateway when it cannot reach the Director: check the Director’s address in external_directors, that the Director is running, and that the network between them allows the connection. Connecting the Director to the manager is covered in the CDN Director documentation.
Important: Your CDN Directors reach Kafka on ports 9092/tcp and 30000-30003/tcp on every machine (one more port per broker if you run more than the default three). The host firewall does not filter these ports, so they are open to any network that can reach the machines. Restrict them to your CDN Directors on your network’s own firewall. See the Networking Guide.
Step 11: Back Up the Zitadel Master Key
Zitadel, the manager’s identity service, encrypts its stored credentials with a master key. If the key is lost, it cannot be recovered. Print it:
kubectl get secret zitadel-masterkey --namespace default -o jsonpath="{.data.masterkey}" | base64 --decode; echo
Store the output somewhere safe, away from the cluster.
Step 12: Sign In to the GUI
In a browser, open https://manager.example.com/gui/:

Sign in with the default administrator account:
- Username:
admin@zitadel.manager.example.com, that is, admin@zitadel. followed by your main manager hostname. - Password:
Password1!
Note: Use the manager hostname you configured, not a machine’s IP address or another name: signing in only works under the main manager hostname. The GUI also needs the full login name above; the email address or admin alone is rejected.
After signing in, the GUI home page appears:
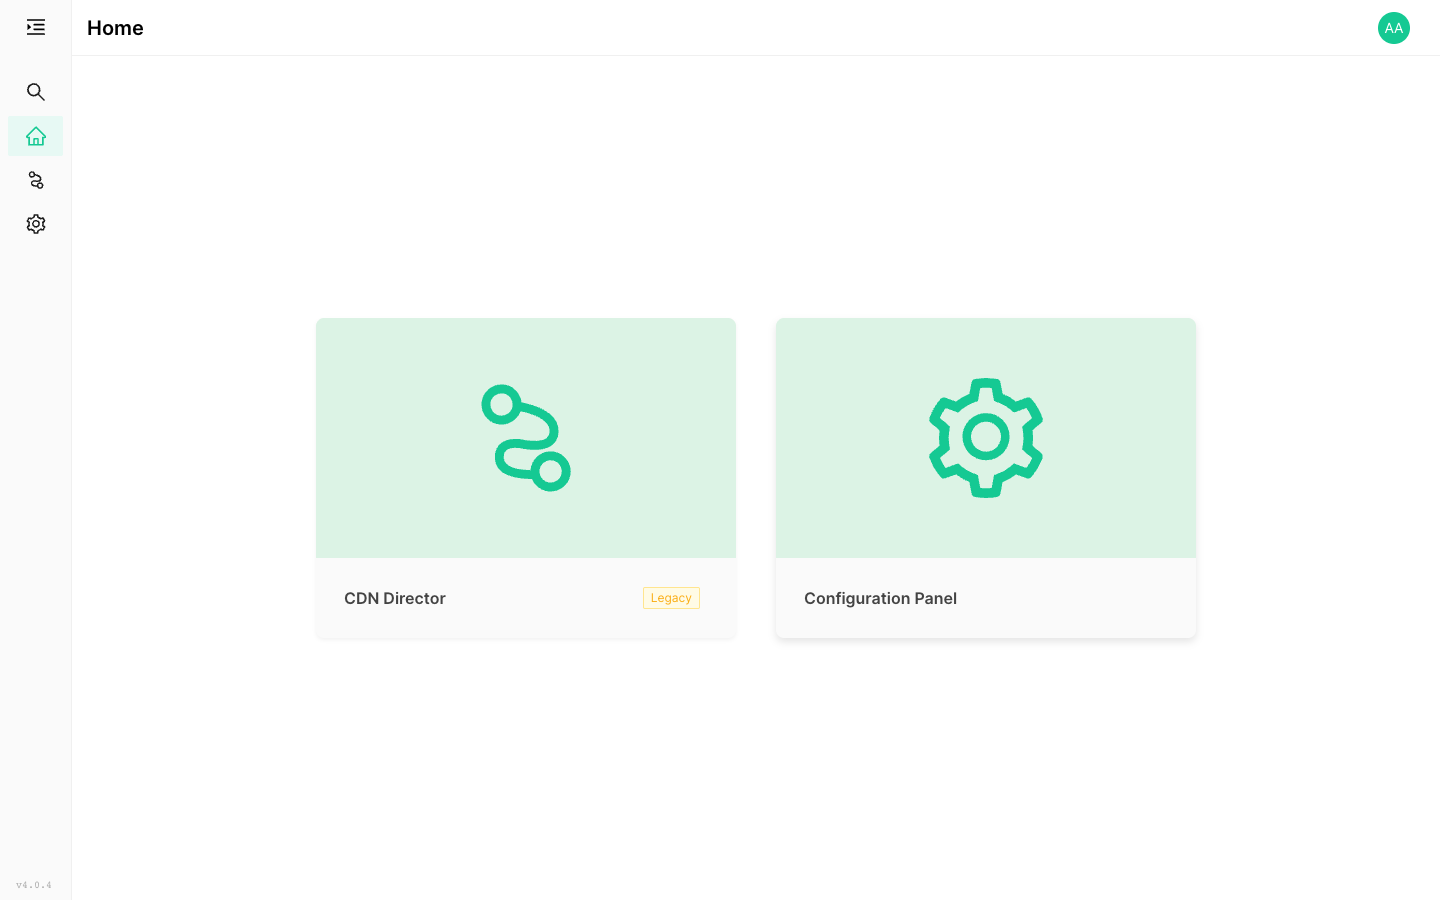
Your CDN Manager cluster is installed.
What’s Next
- Secure the administrator account. The default credentials are published. Create your own administrator, then disable the default account: see Next Steps.
- Add capacity with agent machines: see Inventory.
- Change application settings, such as retention or disk sizes: see Application Settings.
- Change your configuration later: edit the files in
/etc/acd/deploy and run deploy again. That is the only way to change what is installed. See Running deploy.
2 - Inventory
Listing the machines in the cluster and the role each one plays
Overview
The inventory, /etc/acd/deploy/inventory.ini, lists every machine in the cluster and its role. deploy init creates it as a commented example. Edit it before the first deploy, and again whenever you add a machine.
Each machine is one line under the heading for its role:
[server]
manager-1 ansible_host=192.0.2.11
manager-2 ansible_host=192.0.2.12
manager-3 ansible_host=192.0.2.13

[agent]
manager-4 ansible_host=192.0.2.14

[director]
- The first word is the machine’s name. Use its hostname.
ansible_host is the address deploy reaches the machine on over SSH. It does not decide which network the cluster uses: see Site Settings for that.- Everything after a
# is a comment, and indentation does not matter.
Important: The inventory also has a [director] section. Leave it empty. Installing the CDN Director in Kubernetes is not supported in this release. CDN Directors run on their own machines and are listed in external_directors in Site Settings.
Roles
Servers
Servers run the Kubernetes control plane and the cluster datastore, and by default also run the CDN Manager’s workloads.
- The first server listed is the one you run
deploy on. It holds the ISO and the configuration folder. - The number of servers must be odd, so the control plane can always reach a majority. Use three for production: the cluster then survives losing any one machine. One server is enough for a lab, with no redundancy.
deploy stops with [ACD-INVENTORY-EVEN-SERVERS] on an even number, and with [ACD-INVENTORY-NO-SERVER] if there is none.
Agents
Agents run workloads only: they add capacity, but take no part in the control plane. List any machines beyond the servers under [agent], or leave the section empty.
To add an agent to a running cluster, add its line under [agent], set up passwordless SSH to it from the first server, and run deploy again. See Changing the Cluster.
A machine cannot be listed under both [server] and [agent] ([ACD-INVENTORY-SERVER-AND-AGENT]). Changing a machine’s role on a running cluster takes a few extra steps: see Changing a Machine’s Role.
How Many of Each
- Three servers are enough for most clusters. The cluster then survives losing any one server. You are unlikely to need more than five: five servers survive losing two, and more add little except overhead.
- Add servers to improve redundancy, two at a time, since the count must stay odd.
- Add agents to expand capacity. Agents take on workloads without adding to the control plane, so they are the way to grow a cluster.
Per-Machine Options
Each option is added to the end of a machine’s line, separated by a space. None is needed for a normal installation.
node_ip and node_external_ip
The machine’s cluster address (the one other machines reach it on) and its public address (the one clients use). Both are detected automatically:
- The public address is the address of the interface holding the default route.
- The cluster address is the machine’s address inside
backplane_network if that is set, and otherwise its public address.
Set them only to correct one machine where the wrong address is chosen:
manager-2 ansible_host=192.0.2.12 node_ip=10.10.0.12
Every machine’s cluster address must be on one network that all of them share. deploy stops with [ACD-BACKPLANE-SPLIT] before changing anything if they are not.
Important: These addresses are locked at the first installation. Changing one later means reinstalling the cluster. See Locked at First Install.
node_labels
Your own Kubernetes labels for the machine, as a name-and-value mapping in single quotes:
manager-1 ansible_host=192.0.2.11 node_labels='{"rack": "a1"}'
For example, zone labels for Topology Aware Hints are described in the Performance Tuning Guide.
node_taints
Keeps ordinary workloads off the machine, for a server dedicated to the control plane. The platform’s own cluster services tolerate the taint below and keep running there. The value is a list in single quotes:
manager-1 ansible_host=192.0.2.11 node_taints='["CriticalAddonsOnly=true:NoSchedule"]'
Use it only when there are enough other machines to run the workloads, for example three tainted servers and at least three agents. Never taint every machine.
ansible_user
The account deploy logs in as on this machine. The default is root. Another account needs passwordless sudo:
manager-4 ansible_host=192.0.2.14 ansible_user=operator
To change the account for every machine at once, add it under an [all:vars] heading at the end of the file:
[all:vars]
ansible_user=operator
A setting on a machine’s own line still wins for that machine.
SSH Access
deploy logs in to every machine in the inventory from the first server, the first server included, without a password prompt. For each machine, on the first server:
ssh-copy-id root@<machine address>
ssh -o BatchMode=yes root@<machine address> true
The second command must succeed without a prompt. Otherwise deploy stops with UNREACHABLE for that machine.
3 - Site Settings
The settings in group_vars/all.yaml
Overview
Your site settings live in /etc/acd/deploy/group_vars/all.yaml. They are the only deployment settings you set: everything that depends on them, such as the ingress hostnames, the TLS secret, Zitadel’s external domain and the list of CDN Directors, is worked out from them, so related values cannot fall out of step.
Every setting appears once in the file, with comments, and already holds a working default. Change a setting by editing its value in place, then run deploy.
A list can be written on one line or one entry per line. Both mean the same:
manager_hostnames: [manager.example.com, cdn.example.com]

manager_hostnames:
  - manager.example.com
  - cdn.example.com
Settings
manager_hostnames
Required. Every hostname that users and CDN Directors use to reach the manager.
manager_hostnames: [manager.example.com]
- The first entry is the main hostname. Your TLS certificate must cover it, and it is the only name users can sign in under: Zitadel rejects sign-ins made under any other name, including a machine’s IP address.
- Each name needs a DNS record pointing at the public address of one or more of the machines.
- Leave the list empty,
[], only for a quick lab try-out. A temporary hostname and a self-signed certificate are then used.
external_directors
The CDN Directors that use this manager. They run on their own machines, outside the cluster: deploy installs nothing on them, and the manager routes to them.
external_directors:
  - {name: director-1, address: 192.0.2.201}
  - {name: director-2, address: 192.0.2.202}
name is your own name for the Director. The manager publishes its configuration under it, for example at https://<manager hostname>/confd/director-1/config/__active/.address must be the Director’s IPv4 address, not a hostname. deploy stops with [ACD-DIRECTOR-ADDRESS] otherwise.- Leave the list empty,
[], if you have none yet, then add your Directors later and run deploy again. Until you do, the preset’s placeholder Directors stay in the configuration: director-1 and director-2 at 192.0.2.1 and 192.0.2.2 with the production preset, router-1 at 192.0.2.1 with the lab preset. Those addresses are reserved for documentation and reach nothing.
The Directors reach Kafka on 9092/tcp and 30000-30003/tcp on every machine, with one more port per broker beyond the default three. The host firewall does not filter these ports: restrict them on your network’s own firewall. See Kafka Ports.
Important: Each CDN Director must also be able to reach the manager’s ingress (HTTPS on 443/tcp) under one of the names in manager_hostnames. The ingress answers on every address of every cluster machine, public and backplane alike. So Directors on the backplane network can reach the manager there, instead of over the public network. In that case:
- Give the Directors a hostname that resolves, for them, to the machines’ backplane addresses, and add it to
manager_hostnames, after the main hostname. - Make sure your TLS certificate covers that name too, as a Subject Alternative Name (SAN). Otherwise the Directors’ certificate checks fail. See TLS Certificates.
manage_firewall
Whether deploy configures firewalld for you. The default is true.
true: deploy starts and enables firewalld (it must be installed) and configures it on every machine. The machines trust each other for all traffic, the public interface is placed in firewalld’s public zone, and the ports clients need are opened. Before the first run, make sure the public zone allows everything else you need on the public interface, SSH included: firewall-cmd --zone=public --list-all should list ssh under services. See Firewall for exactly what is set up.false: you configure the firewall yourself. deploy only checks that the required ports are open and the pod and service networks are trusted, and stops before changing anything if not. Only firewalld is checked: if it is not running, the check is skipped, and your own firewall must allow the same traffic.
To switch a running cluster from true to false, follow Managing the Firewall Yourself first.
manage_routes
Whether deploy keeps cluster traffic on the main routing table. The default is true; leave it on.
With true, deploy adds lookup main routing rules at priority 50 for the pod network, the service network, and the network the machines reach each other on. This matters on machines that use policy routing, where traffic from an address is sent through its own routing table: without these rules, cluster traffic can leave through the wrong interface. On machines without policy routing, the rules are harmless.
deploy owns priority 50 on the NetworkManager profiles of the backplane and public interfaces, and replaces any rule there at that priority. Keep your own rules at other priorities.- Your own rules that cluster traffic can match, such as
from <address> lookup <table>, must have a priority number of 51 or more. deploy stops with [ACD-ROUTING-CONFLICT], naming the rule, otherwise. - If your rules must stay at 50 or below, set
manage_routes: false and add your own lookup main rules for those three networks, at a priority other than 50 and ahead of your source rules. See Managing Routing Yourself for the rules and the commands.
Either way, deploy checks that cluster traffic uses the main routing table before it changes anything.
Locked at First Install
The settings below are marked as a separate section in the file. Set them before the first deploy and never change them afterwards: the cluster is built around them. Changing one later means uninstalling k3s from every machine and installing again. A reinstall starts with an empty cluster: the PostgreSQL databases, Kafka’s messages and everything else stored in the cluster are lost unless you have backed them up.
The same applies to each machine’s node_ip and node_external_ip in the inventory, and to the machines’ hostnames. On a running cluster, deploy compares these with what the cluster uses, and stops before changing anything if they differ.
backplane_network
Optional, but recommended. The address range of the backplane network, the network the cluster machines use to talk to each other, such as "10.10.0.0/24". Leave it empty, "", if you have no backplane: the machines then talk to each other over the public network.
When it is set, deploy finds each machine’s interface in that range and configures the cluster to use it: all node-to-node (east-west) traffic runs over it, including Kubernetes, its pod network and the cluster datastore.
- The backplane should be a separate network from the public network, the one holding the default route. Setting it to the public network’s range works, but then every host on the public network is trusted for all traffic.
- Every machine needs exactly one interface in the range, and must be reachable from the others on it.
deploy stops with [ACD-BACKPLANE-NO-MATCH] or [ACD-BACKPLANE-AMBIGUOUS] otherwise. - The backplane does not have to be reserved for the cluster: other hosts, such as your CDN Directors, may also be on it. With
manage_firewall: true, every host on the backplane can reach every port on every cluster machine, including the cluster datastore (etcd, 2379-2380/tcp), the Kubernetes API (6443/tcp) and the kubelet (10250/tcp), so connect only hosts you trust to it.
See Configuring Segregated Networks.
cluster_pod_cidr and cluster_svc_cidr
The address ranges Kubernetes gives its pods and its services. The defaults are 10.42.0.0/16 and 10.43.0.0/16.
Change them only if your network already uses addresses in these ranges. The two must not overlap each other, or any address or route on any machine. deploy stops with [ACD-CIDR-OVERLAP] or [ACD-CIDR-IN-USE] before changing anything if they do.
firewall_cluster_zone and firewall_public_policy
The names of the firewalld zone and policy that deploy keeps as its own. The defaults are acd-cluster and acd-public. The zone trusts the cluster, and the policy opens the ports reached from outside.
deploy removes anything in them that it did not put there, so pick names nothing else on the machines uses. Never use one of firewalld’s own names, such as public or trusted. The zone name can be up to 17 characters and the policy name up to 18, using letters, digits, - and _. The defaults suit most sites.
File Locations
Most sites leave these empty: the files are picked up from the configuration folder.
| Setting | Default | Set it to use a file kept elsewhere |
|---|
tls_cert_file, tls_key_file | "", from certs/ | Your certificate and key. See TLS Certificates. |
maxmind_city_db, maxmind_asn_db, maxmind_anon_db | "", from maxmind/ | Your three MaxMind databases. See MaxMind GeoIP Databases. |
backup_dir | /var/lib/acd/backups | Where each run’s backup is written on the first server. See Backups. |
4 - TLS Certificates
Serving HTTPS with your own certificate
Overview
The manager serves all its interfaces (the GUI, the API, Zitadel and Grafana) over HTTPS on port 443, under the hostnames in manager_hostnames. Give it a certificate by putting the certificate and its key in /etc/acd/deploy/certs/ and running deploy.
We recommend a certificate from a certificate authority (CA) your users and CDN Directors already trust, such as your organization’s own CA or a public one. Without a certificate, deploy serves a temporary self-signed one, which every browser and client warns about.
Requirements
- PEM format: text files beginning with
-----BEGIN. Convert DER or PKCS#12 files to PEM first. - Two files: the certificate in one, the private key in the other. The file names do not matter:
deploy identifies them by their contents. - The full chain: your certificate followed by any intermediate certificates, often supplied as
fullchain. - No passphrase on the private key.
- The right names: the certificate must cover the first entry of
manager_hostnames, directly or by a wildcard such as *.example.com. Cover the other entries too, as Subject Alternative Names (SANs), or clients using them fail their certificate check. This includes any name your CDN Directors use to reach the manager, such as a name for the backplane addresses. - Exactly one certificate and one key in the folder.
Adding or Replacing the Certificate
Copy the files into the folder, and keep the key readable only by root:
cp manager-fullchain.crt manager.key /etc/acd/deploy/certs/
chmod 600 /etc/acd/deploy/certs/manager.key
When replacing a certificate, remove the old files first, so the folder holds only one pair.
Check the names and dates:
openssl x509 -in /etc/acd/deploy/certs/manager-fullchain.crt -noout -subject -issuer -dates -ext subjectAltName
Expected output:
subject=CN = manager.example.com
issuer=CN = Example Issuing CA
notBefore=Oct 14 18:57:23 2026 GMT
notAfter=Jan 16 18:57:23 2027 GMT
X509v3 Subject Alternative Name:
    DNS:manager.example.com
Run deploy:
deploy checks the pair before it changes anything: that both are readable, that they match, that the certificate has not expired, and that it covers the main hostname. It then stores them in the cluster as the ingress certificate for every manager hostname.
The certificate and key are not included in the backups deploy takes. Keep your own copies.
Checking the Served Certificate
From any machine that can reach the manager:
openssl s_client -connect manager.example.com:443 -servername manager.example.com </dev/null 2>/dev/null | grep -E 'subject=|issuer=|Verify return code'
Expected output:
subject=CN = manager.example.com
issuer=CN = Example Issuing CA
Verify return code: 0 (ok)
A verify return code other than 0 means this machine does not trust the issuing CA. With a private CA, add -CAfile <your CA certificate> to the command, and install the CA certificate on every client that connects to the manager, CDN Directors included.
A Certificate for a Test Cluster
For a lab or test cluster without a certificate, you can create a private CA and issue a certificate from it. Clients then trust the manager once they trust the CA. Do not use this for production.
mkdir -p /root/test-ca && cd /root/test-ca

# A private CA, valid for ten years
openssl req -x509 -newkey rsa:4096 -sha256 -days 3650 -nodes \
    -keyout test-ca.key -out test-ca.crt -subj "/CN=Test CA"

# A key and certificate request for the manager
openssl req -newkey rsa:2048 -sha256 -nodes \
    -keyout manager.key -out manager.csr -subj "/CN=manager.example.com"

# Sign it, naming every manager hostname
cat > manager.ext <<'EOF'
basicConstraints=CA:FALSE
keyUsage=digitalSignature,keyEncipherment
extendedKeyUsage=serverAuth
subjectAltName=DNS:manager.example.com
EOF
openssl x509 -req -in manager.csr -CA test-ca.crt -CAkey test-ca.key -CAcreateserial \
    -days 825 -sha256 -extfile manager.ext -out manager.crt

# Install the full chain and the key
cat manager.crt test-ca.crt > /etc/acd/deploy/certs/manager-fullchain.crt
install -m 600 manager.key /etc/acd/deploy/certs/manager.key
Then run deploy. Pass --cacert /root/test-ca/test-ca.crt to curl, and import test-ca.crt into your browser, to connect without warnings.
Problems
| Code | Cause | Fix |
|---|
[ACD-TLS-NOT-PEM] | No file in certs/ is a readable PEM certificate or key. | Convert the files to PEM. |
[ACD-TLS-COMBINED-FILE] | One file holds both the certificate and the key. | Split them into two files. |
[ACD-TLS-TOO-MANY] | More than one certificate or key in certs/. | Leave exactly one of each. |
[ACD-TLS-UNPAIRED] | A certificate without a key, or a key without a certificate. | Provide both, or neither for a self-signed certificate. |
[ACD-TLS-KEY-UNREADABLE] | The key is not PEM, or has a passphrase. | Remove the passphrase: openssl pkey -in <key> -out <key>.plain. |
[ACD-TLS-KEY-MISMATCH] | The certificate and key are not a pair. | Use the key the certificate was requested with. |
[ACD-TLS-CERT-EXPIRED] | The certificate has expired. | Replace it with a current one. |
[ACD-TLS-HOSTNAME] | The certificate does not cover the first entry of manager_hostnames. | Reissue it for that name, or for a wildcard covering it. |
5 - MaxMind GeoIP Databases
Enabling geographic routing with your own MaxMind databases
Overview
The manager looks up the location, network and anonymity of client addresses in MaxMind GeoIP databases, for geographic routing and the GeoIP API. The databases are not shipped with the CDN Manager: obtain them from your own MaxMind subscription.
Three databases are needed, as .mmdb files:
| Database | Example file name | Name must contain |
|---|
| City | GeoIP2-City.mmdb | City |
| ASN | GeoLite2-ASN.mmdb or GeoIP2-ASN.mmdb | ASN |
| Anonymous IP | GeoIP2-Anonymous-IP.mmdb | Anon |
Provide all three or none. Without them, the CDN Manager installs and runs, but geographic routing is off.
Adding or Updating the Databases
Copy the three files into /etc/acd/deploy/maxmind/, replacing any older copies:
cp GeoIP2-City.mmdb GeoLite2-ASN.mmdb GeoIP2-Anonymous-IP.mmdb /etc/acd/deploy/maxmind/
ls -l /etc/acd/deploy/maxmind/
Expected output:
total 126236
-rw-r--r--. 1 root root      4382 Oct 14 18:57 GeoIP2-Anonymous-IP.mmdb
-rw-r--r--. 1 root root 121642973 Oct 14 18:57 GeoIP2-City.mmdb
-rw-r--r--. 1 root root   7609502 Oct 14 18:57 GeoLite2-ASN.mmdb
-rw-r--r--. 1 root root       400 Oct 14 18:57 README.txt
Run deploy:
deploy loads the databases into the cluster after installing the CDN Manager, and loads them again only when they have changed. MaxMind publishes updates regularly: repeat these steps to apply them.
The databases are not included in the backups deploy takes. Keep your own copies.
Checking the Databases
When the databases are loaded, the final health check of deploy reports:
"msg": "Deployment gate PASSED for cdn-platform. GeoIP is serving."
To look up an address yourself:
curl 'https://manager.example.com/api/v1/routing/geoip?ip=8.8.8.8'; echo
Expected output (shortened):
{"city":{"continent":{"code":"NA",...},"country":{"iso_code":"US",...},...},"asn":{"autonomous_system_number":15169,"autonomous_system_organization":"GOOGLE"},"anon":{}}
See the Routing API for the full response.
Keeping the Files Elsewhere
To use files kept in another folder, set their paths in Site Settings instead of copying them:
maxmind_city_db: "/opt/maxmind/GeoIP2-City.mmdb"
maxmind_asn_db: "/opt/maxmind/GeoLite2-ASN.mmdb"
maxmind_anon_db: "/opt/maxmind/GeoIP2-Anonymous-IP.mmdb"
Problems
| Code | Cause | Fix |
|---|
[ACD-MAXMIND-INCOMPLETE] | maxmind/ holds some, but not all three, databases. | Provide all three, or none. |
[ACD-MAXMIND-AMBIGUOUS] | More than one file matches the same database. | Leave one file per database. |
6 - Application Settings
Presets, values.override.yaml, and the generated values.yaml
Overview
The CDN Manager is a Helm release, cdn-platform, configured by Helm values. deploy builds those values from three layers, each overriding the one before it:
| Layer | File | Who writes it |
|---|
| 1. Preset | preset.yaml, a link to a file on the ISO | AgileTV |
| 2. Your overrides | values.override.yaml | You |
| 3. Derived settings | worked out from group_vars/all.yaml and the certs/ folder | deploy |
deploy merges them into /etc/acd/deploy/values.yaml on every run and installs the release with that one file.
Most sites need nothing beyond the preset and their site settings.
Presets
The preset is the complete starting configuration, chosen once with deploy init and remembered for every later run:
| Preset | Command | ISO file | Use it for |
|---|
| Production | deploy init prod (the default) | values-production.yaml | Production clusters of three or more machines. Replicated services are spread across machines, with production resource sizing. |
| Lab | deploy init lab | values-lab.yaml | A single-machine lab, demonstration or acceptance test. Single replicas and small resource requests. |
The preset is read from the ISO through the preset.yaml link, never copied. A new release’s ISO therefore brings its own defaults with it. This is also why the ISO must be mounted whenever you run deploy.
Overriding Settings
Write only the settings you want to change in /etc/acd/deploy/values.override.yaml, keeping the same nesting as in the preset. It starts empty. For example, to make the manager log in more detail while you investigate a problem:
cdn-manager:
  manager:
    logLevel: debug
Then run deploy. To undo it, remove the setting and run deploy again.
Warning: Set volume sizes before the first deploy. Helm cannot change the size of a persistent volume claim that already exists, so changing a size or persistence setting in values.override.yaml on an installed cluster does not resize the volume, and can make the upgrade fail. This applies to every component with storage, such as Kafka, VictoriaMetrics, PostgreSQL and Redis. Raising a retention setting also uses more disk, so check the volume has room first.
To find a setting, look it up in the preset on the ISO (/mnt/esb3027/values-production.yaml or /mnt/esb3027/values-lab.yaml), in the full reference /mnt/esb3027/values.yaml, or in the Configuration Guide.
Note: Some settings are derived and override anything in values.override.yaml: every manager hostname, Zitadel’s external domain, the TLS secret, and the list of CDN Directors whenever external_directors is not empty. Set those through manager_hostnames, external_directors and the certs/ folder instead.
The Generated values.yaml
/etc/acd/deploy/values.yaml holds the exact values the cluster received. Read it to see the result of the three layers.
Do not edit it: deploy rewrites it on every run, and stops with [ACD-VALUES-EDITED] if it was changed by hand. Move the change into values.override.yaml or group_vars/all.yaml, then delete values.yaml and run deploy again.
7 - Running deploy
What a run does, checking and restoring backups, and what to send support
Overview
deploy is on the installation ISO, at /mnt/esb3027/deploy. Run it as root on the first server in the inventory, with the ISO mounted at /mnt/esb3027. It reaches every other machine over SSH. For its commands, options, files and exit status, see the deploy reference.
To change what is installed, edit the files in /etc/acd/deploy and run deploy. Do not change the release with helm directly: the next deploy replaces it with what the configuration says.
What a Run Does
The first run installs; every later run re-applies your settings and changes only what differs. Running it again is safe, including after a failed run. deploy checks each machine after changing its network, and on a running cluster changes them one at a time, but a wrong network setting can still cut a machine off, and the run then stops with [ACD-NODE-UNREACHABLE].
Each run goes through fixed stages:
| Stage | What it does | Changes anything? |
|---|
| Gather inputs | Reads every machine and works out the settings | No |
| Preflight | Checks the machines, the settings and, on a running cluster, the locked settings | No |
| Backup | Archives each machine’s configuration on the first server | Writes the backup only |
| Media | Copies what the other machines need from the ISO | Yes |
| Values | Writes values.yaml | Yes |
| Host network | Configures firewall zones, routing rules and kernel network settings, then verifies them | Yes |
| Cluster | Installs or upgrades k3s: the first server, then the other servers one at a time, then the agents | Yes |
| Platform | Installs or upgrades the cdn-platform release, loads the MaxMind databases, and runs the health check | Yes |
deploy backup runs only the first and third stages. --skip-tags preflight skips the second; use it only when you are sure a check is wrong for your site.
When deploy stops on a problem it recognizes, its message starts with a code such as [ACD-TLS-HOSTNAME]. See Installation Troubleshooting.
Backups
Important: These backups hold only the deployment’s configuration, each machine’s configuration and an etcd snapshot of the Kubernetes state. They do not include the data stored in the cluster: not the PostgreSQL databases, not Kafka’s messages, not the contents of any persistent volume, and not the metrics. Restoring one of these backups puts a machine’s configuration back; it cannot recover lost data. Back up the data separately: see Backup Procedures.
Every run of deploy takes a backup first, and deploy backup takes one without changing anything. Each backup is a folder under /var/lib/acd/backups on the first server: see the deploy reference for its files. deploy never deletes a backup: remove old folders yourself. Keep your own copies of the TLS certificate and key and the MaxMind databases, which the backup leaves out.
Important: Treat backups as secret material. A backup of a running cluster holds an etcd snapshot of the whole cluster, which contains every Kubernetes Secret: database passwords, the Zitadel master key and TLS keys among them. Every machine’s archive, servers’ and agents’, also holds the cluster token, and the servers’ hold the cluster-admin kubeconfig, /etc/rancher/k3s/k3s.yaml. Keep backups, and any copies you make, readable only by root, and delete the ones you no longer need.
The etcd snapshot is in two places, and deploy prunes neither:
the backup folder under /var/lib/acd/backups on the first server, inside one server’s <machine>.tar.gz. Remove an old backup folder with:
rm -r /var/lib/acd/backups/<folder>
/var/lib/rancher/k3s/server/db/snapshots on that server, named acd-backup-<UTC time>-<machine>-<number>. List and delete old ones on that server with:
k3s etcd-snapshot list
k3s etcd-snapshot delete <name>
k3s also takes its own etcd snapshots, in the same folder on every server, named etcd-snapshot-<machine>-<time>: one every 12 hours, keeping the latest five, which k3s prunes itself. They hold every Kubernetes Secret too, so treat them, and any copy of them, as secret material.
The backup folder on the first server also holds a copy of /etc/acd/deploy, except the certs/ and maxmind/ folders and deploy.log, which it leaves out. Keep a copy of the latest backup folder off the first server, so that losing it does not lose the configuration deploy needs. Protect the copy as the warning above describes.
Before relying on a backup, check it:
cd /var/lib/acd/backups/<folder>
sha256sum -c SHA256SUMS
Restoring a Machine’s Files
Copy the machine’s archive and checksum file to it, then, as root:
tar --selinux --xattrs --acls -C / -xpzf <machine>.tar.gz
sha256sum -c <machine>.files.sha256
Keep the --selinux --xattrs --acls options: plain tar restores some k3s files with the wrong SELinux label. Then reboot the machine, or restart NetworkManager and k3s.
Rolling back the cluster itself also needs the etcd snapshot, restored on one server with the k3s cluster-reset procedure: stop k3s on every server, restore that server’s archive, run k3s server --cluster-reset --cluster-reset-restore-path=<snapshot path> on it, start k3s there, and rejoin the other servers. See the k3s etcd snapshot documentation for the full procedure.
What to Send Support
When the final health check fails, deploy writes /etc/acd/deploy/support-bundle-acd.tar.gz: send it to AgileTV support. When a run stops before the health check, send deploy.log, decision-record.json and the probe/ folder from /etc/acd/deploy instead.
8 - Changing the Cluster
Adding machines and changing a machine’s role
Overview
The machines in the cluster are whatever inventory.ini lists. To change them, edit the inventory and run deploy. This page covers the changes that need more than that.
Before you start, check that the cluster is healthy: every node yes under READY and every admin target ok under HEALTH in acd-admin status.
Adding an Agent
Install the new machine as for the others: see Before You Begin. If you use a backplane, give it an address in backplane_network.
From the first server, set up SSH to it:
ssh-copy-id root@192.0.2.14
ssh -o BatchMode=yes root@192.0.2.14 hostname
Add it under [agent] in /etc/acd/deploy/inventory.ini:
[agent]
manager-4 ansible_host=192.0.2.14
Run deploy:
deploy configures the new machine’s network, joins it to the cluster, and updates every other machine’s firewall to trust it.
Adding Servers
The number of servers must stay odd, so add servers two at a time, for example to go from one to three. Prepare both machines as for an agent, list both under [server], and run deploy once. deploy joins them one at a time.
Changing a Machine’s Role
k3s cannot turn a server into an agent, or an agent into a server, in place: the machine leaves the cluster and joins again in its new role. Because the number of servers must stay odd, a role change always moves two machines: two agents promoted to go from one server to three, two servers demoted to go from three to one, or a server and an agent swapped.
Take the first machine out of the cluster, whether it is a server or an agent. From any server, drain and remove it:
acd-admin drain <machine>
kubectl delete node <machine>
The drain moves the machine’s pods elsewhere. It can take several minutes while storage moves, and reports what it is waiting for. If it does not finish, see When a Drain Does Not Finish. Removing the node needs kubectl: acd-admin has no command for it. Read Safety first.
Then, on the machine itself, uninstall k3s: run /usr/local/bin/k3s-uninstall.sh if it was a server, or /usr/local/bin/k3s-agent-uninstall.sh if it was an agent.
Only when the first machine is out, do the same for the second. Taking two out at once can leave too few machines for the workloads.
List both machines under their new roles in inventory.ini, and run deploy.
With a single server, promoting two agents leaves the server alone to run every workload while both agents are out. Expect pods to stay Pending until the machines rejoin. The deploy that brings them back allows for this, and waits up to 10 minutes for the pods to start.
If a machine is listed under a role other than the one it runs, deploy stops with [ACD-INVENTORY-ROLE-CHANGED] before changing anything.
When a Drain Does Not Finish
acd-admin drain waits for every pod it moves, and has no timeout of its own. Its session ends after 12 hours; running drain again carries on where it stopped. Storage does not hold it up for long: each volume has replicas on other machines, and for the Kafka data volumes, which have a single replica, the storage layer (Longhorn) copies the replica to another machine before it lets the drain go on. While that happens, the drain names the pod whose eviction a disruption budget refuses for now, and keeps retrying.
If it still waits, read what it names:
- A pod that is terminating but not gone, with the finalizer holding it. On a machine that is not Ready, such a pod stays until the machine returns. Once the drain waits only on such pods, press Ctrl-C: the machine stays drained.
- A pod whose eviction is refused for a long time. Check
acd-admin status for an admin target that is not ok, and kubectl -n longhorn-system get volumes.longhorn.io for a volume that is not healthy. A disruption budget refuses to evict a pod while its other pods are not Ready. Fix that, and the drain carries on.
See acd-admin drain.
Things You Cannot Change
The cluster is built around a few settings that cannot change once it is installed: backplane_network, cluster_pod_cidr, cluster_svc_cidr, the firewall zone and policy names, each machine’s node_ip and node_external_ip, and the machines’ hostnames. See Locked at First Install.
9 - Air-Gapped Installation
Installing without internet access
Overview
The installation ISO carries everything the CDN Manager needs, container images included, so an installation needs no internet access. What deploy does need is the operating system’s own packages: it installs a few with dnf on every machine: ansible-core on the first server, and on all of them rsync, tar, zstd, bash-completion, the storage tools (iscsi-initiator-utils and nfs-utils), and container-selinux, which the cluster’s SELinux policy needs.
Without internet access, give every machine a local package repository from the operating system’s installation media, then follow the Quickstart as written.
Prerequisites
| Media | Purpose |
|---|
esb3027-cdn-manager-1.8.0.iso | The CDN Manager, on the first server only |
| The installation ISO of your operating system, for the same release as the machines | Operating system packages, on every machine |
Set Up a Local Repository on Every Machine
On each machine, mount the operating system ISO and add its two repositories. This example is for Red Hat Enterprise Linux 9; on a rebuild, use its ISO and the signing key file its own documentation names.
mkdir -p /mnt/os
mount -o loop,ro /root/rhel-9.4-x86_64-dvd.iso /mnt/os

cat > /etc/yum.repos.d/os-media.repo <<'REPO'
[os-media-baseos]
name=OS media - BaseOS
baseurl=file:///mnt/os/BaseOS
enabled=1
gpgcheck=1
gpgkey=file:///etc/pki/rpm-gpg/RPM-GPG-KEY-redhat-release

[os-media-appstream]
name=OS media - AppStream
baseurl=file:///mnt/os/AppStream
enabled=1
gpgcheck=1
gpgkey=file:///etc/pki/rpm-gpg/RPM-GPG-KEY-redhat-release
REPO
Disable any repository the machine cannot reach, or dnf fails while trying to read it:
dnf repolist
dnf config-manager --set-disabled <repository id>
Then check that dnf can find the packages:
dnf -q repoquery --latest-limit 1 ansible-core rsync tar zstd bash-completion iscsi-initiator-utils nfs-utils container-selinux
Each package should be listed once, whether or not it is already installed.
Important: Keep the local repository available on every machine whenever you run deploy, not only for the first installation. Every run installs or checks packages with dnf on each machine, and stops if it cannot reach them. Remount the operating system ISO after a reboot, as you do the CDN Manager ISO.
Install
Follow the Quickstart. Copy the MaxMind databases, your TLS certificate and its key, and both ISOs to the machines by whatever means your site allows.
If the first server cannot install ansible-core, deploy init stops with:
Error: could not install ansible-core. Ensure your OS repositories
or mounted install media are available to dnf (air-gap SOP).
Check the repository on that machine and run deploy init again.
10 - Upgrade Guide
Moving to a new release of the CDN Manager
Upgrading to 1.8 from an Earlier Release
Version 1.8 cannot be installed over 1.6 or any earlier release. The platform’s Helm charts were rearranged, and the cluster is now built and managed by deploy, so an earlier cluster cannot be upgraded in place.
To move to 1.8:
- Install 1.8 on a new cluster, on new or reinstalled machines, with the Quickstart.
- Set up its users and configuration. Contact AgileTV support to plan moving your existing configuration.
- Point your CDN Directors at the new manager, then retire the old cluster.
Upgrading from 1.8 to a Later Release
From 1.8 on, an upgrade is a deploy run with the new release’s ISO: deploy upgrades k3s on each machine, one server at a time, then upgrades the cdn-platform release.
Read the Release Notes for the new release, for any step it needs before or after the upgrade.
Check that the cluster is healthy:
Replace the ISO at /mnt/esb3027 with the new one, on the first server:
umount /mnt/esb3027
mount -o loop,ro /root/esb3027-cdn-manager-<new version>.iso /mnt/esb3027
The preset link in /etc/acd/deploy points into /mnt/esb3027, so mount the new ISO at the same path.
Run deploy init from the new ISO. It is safe to run again: it replaces the installed Ansible collections with the new ISO’s versions, installs ansible-core only if it is missing, keeps your preset, and leaves the files you have edited alone.
Run deploy:
deploy takes a backup of the configuration before it changes anything, including an etcd snapshot of the cluster. That backup does not include the data stored in the cluster, such as the PostgreSQL databases: back that up first, as described in Backup Procedures. See Backups.
11 - Installation Troubleshooting
What deploy’s failure codes mean, and what to do about them
Overview
deploy checks the machines and your settings before it changes anything, and checks its own work as it goes. When it stops on a problem it recognizes, the message starts with a code in square brackets, such as [ACD-TLS-HOSTNAME], and names the machine, file or setting involved. The code stays the same when the wording changes, so search for it on this page, or quote it to support.
After fixing the cause, run deploy again. Re-running is safe: it picks up from the state the cluster is in. “Nothing was changed” in the table below means the run stopped before its first change.
Expected Messages
These appear in a successful run, and need no action:
| Message | Why |
|---|
FAILED - RETRYING: [<machine>]: Wait for this server to become Ready (N retries left). | deploy polls each joining machine until it is ready. Ten or more per machine is normal. |
[WARNING]: Collection ansible.posix does not support Ansible version ... | The bundled collection works with the ansible-core release of Enterprise Linux 9. |
[WARNING]: Could not match supplied host pattern, ignoring: acd_host_network_verify | No machine’s network needed checking at that point. |
Problems Without a Code
| Symptom | Cause | Fix |
|---|
UNREACHABLE for a machine | deploy cannot log in to it over SSH without a password. | Set up the key: see SSH Access. |
preset.yaml points at ..., which does not exist | The installation ISO is not mounted at the path deploy init used, normally /mnt/esb3027. | Mount it at that path, or run deploy init again from where it is mounted now. |
ansible-core is not installed | deploy init has not been run on this machine, or ansible-core was removed. | Run /mnt/esb3027/deploy init. It keeps the preset an existing configuration already uses; a new configuration gets prod unless you add lab. |
deploy init cannot install ansible-core | dnf cannot reach the operating system’s repositories. | Fix the repositories. Without internet access, see Air-Gapped Installation. |
| Signing in fails, though the pages load | The browser uses a name other than the main manager hostname, such as an IP address. | Browse to the first entry of manager_hostnames. Sign in to the GUI as <user>@zitadel.<manager hostname>. |
Failure Codes
Each code below gives the cause, then what to do.
[ACD-ANSIBLE-VERSION]
Cause: The installed ansible-core is older than 2.14.
What to do: Run dnf update ansible-core.
[ACD-HOST-PROBE-IN-DEPLOY]
Cause: A machine has a host_probe setting. It is an input for tests and for replaying a run, and deploy reads every machine itself. Nothing was changed.
What to do: Remove the host_probe setting from inventory.ini and host_vars.
[ACD-HOST-PROBE-SCHEMA]
Cause: A machine’s host_probe setting, used by tests and replays, has a format version this deploy cannot read. Nothing was changed.
What to do: Replace it with that machine’s probe/<machine>.json from a run of this release, or remove the host_probe setting.
[ACD-NO-DEFAULT-ROUTE]
Cause: A machine has no IPv4 default route, so its address cannot be chosen.
What to do: Give the machine a default route.
[ACD-BACKPLANE-AMBIGUOUS]
Cause: backplane_network matches more than one interface on a machine.
What to do: Narrow backplane_network, or set node_ip to the address on the backplane interface, on that machine’s line in inventory.ini.
[ACD-BACKPLANE-NO-MATCH]
Cause: backplane_network matches no interface on a machine.
What to do: Fix backplane_network, or set node_ip to the address on the backplane interface, on that machine’s line in inventory.ini. Every machine needs an address in backplane_network.
[ACD-NODE-ADDRESS-NOT-FOUND]
Cause: No interface on a machine holds the address chosen for it.
What to do: Check node_ip for that machine, or backplane_network.
[ACD-DEFAULT-ADDRESS-NOT-FOUND]
Cause: No interface on a machine holds its default route’s source address.
What to do: Give the default route a source address that one of the machine’s interfaces holds.
[ACD-NM-NOT-RUNNING]
Cause: NetworkManager is not running on a machine, so the deployment cannot set its interfaces’ zones or routing rules.
What to do: Start it with systemctl enable --now NetworkManager and run deploy again.
[ACD-NM-CONNECTION-MISSING]
Cause: An interface the deployment configures has no active NetworkManager connection.
What to do: Let NetworkManager manage it (nmcli device set <interface> managed yes), give it a connection (nmcli device connect <interface>, or nmcli connection add) and run deploy again.
[ACD-PARTIAL-RUN]
Cause: The run was limited to some machines, so it could not plan every machine’s network. What each machine trusts depends on all of them.
What to do: Run deploy without --limit.
[ACD-DIRECTOR-ADDRESS]
Cause: An entry in external_directors has no address, or one that is not an IPv4 address.
What to do: Give each CDN Director’s IPv4 address, such as 192.0.2.201.
[ACD-MAXMIND-AMBIGUOUS]
Cause: More than one file in maxmind/ matches the same MaxMind database.
What to do: Leave one file per database in maxmind/.
[ACD-MAXMIND-INCOMPLETE]
Cause: maxmind/ holds some, but not all three, MaxMind databases.
What to do: Provide all three databases, or none.
[ACD-TLS-COMBINED-FILE]
Cause: One file in certs/ holds both the certificate and the private key.
What to do: Split them into two PEM files in certs/.
[ACD-TLS-TOO-MANY]
Cause: certs/ holds more than one certificate or more than one key.
What to do: Leave exactly one certificate and one key.
[ACD-TLS-UNPAIRED]
Cause: certs/ holds a certificate without a key, or a key without a certificate.
What to do: Provide both, or neither for a temporary self-signed certificate.
[ACD-TLS-NOT-PEM]
Cause: certs/ holds files, but none is a readable PEM certificate or key.
What to do: Convert DER or PKCS#12 files to PEM.
[ACD-TLS-CERT-UNREADABLE]
Cause: The certificate file cannot be read as a PEM certificate.
What to do: Provide a PEM certificate.
[ACD-TLS-KEY-UNREADABLE]
Cause: The private key cannot be read: it is not PEM, or it has a passphrase.
What to do: Remove the passphrase with openssl pkey -in <key> -out <key>.plain.
[ACD-TLS-KEY-MISMATCH]
Cause: The certificate and the private key are not a pair.
What to do: Provide the key the certificate was requested with.
[ACD-TLS-CERT-EXPIRED]
Cause: The certificate has expired.
What to do: Replace it with a current certificate.
[ACD-TLS-HOSTNAME]
Cause: The certificate does not cover the first entry of manager_hostnames.
What to do: Reissue it for that name, or for a wildcard covering it.
[ACD-INVENTORY-NO-SERVER]
Cause: The inventory lists no server machine.
What to do: List at least one; the first server is the control machine.
[ACD-INVENTORY-STRAY-DIRECTOR]
Cause: A machine is listed under [director].
What to do: Leave the [director] section empty. List CDN Directors in external_directors in Site Settings.
[ACD-INVENTORY-SERVER-AND-AGENT]
Cause: A machine is listed under both server and agent.
What to do: List it under only one.
[ACD-INVENTORY-EVEN-SERVERS]
Cause: The inventory lists an even number of servers.
What to do: List an odd number of servers; move the rest under agent.
[ACD-INVENTORY-DUPLICATE-HOSTNAME]
Cause: Two machines share a hostname, ignoring case.
What to do: Give each machine a unique hostname.
[ACD-INVENTORY-ROLE-CHANGED]
Cause: A machine runs k3s as a server but is listed as an agent, or the other way round.
What to do: List it under its current role, or follow Changing a Machine’s Role.
[ACD-NODE-OS]
Cause: A machine does not run Enterprise Linux 9.4 or a later 9 release.
What to do: Update or reinstall it, or remove it from the inventory.
[ACD-NODE-KERNEL-MODULES]
Cause: A machine lacks kernel modules k3s and its storage need.
What to do: Install the kernel modules package for the running kernel.
[ACD-NODE-RESOURCES]
Cause: A machine has fewer processor cores or less memory than its role needs.
What to do: Add cores or memory, or make it an agent.
[ACD-VALUES-EDITED]
Cause: values.yaml was edited by hand.
What to do: Move the changes to values.override.yaml or group_vars/all.yaml, then delete values.yaml.
[ACD-CLUSTER-API-DOWN]
Cause: k3s is installed, but no server’s k3s API answers.
What to do: Get k3s answering on one server. If you are sure the check is wrong, run deploy --skip-tags preflight.
[ACD-CLUSTER-NODE-RENAMED]
Cause: A machine’s hostname changed after it joined the cluster.
What to do: Set the hostname back to the name in the message.
[ACD-CLUSTER-NODE-ADDRESS]
Cause: A machine’s cluster address differs from the one the settings choose.
What to do: Set the address settings back to what the cluster runs with; see Locked at First Install.
[ACD-CLUSTER-POD-CIDR]
Cause: A machine’s pod range lies outside cluster_pod_cidr.
What to do: Set cluster_pod_cidr back to what the cluster runs with.
[ACD-CLUSTER-SERVICE-CIDR]
Cause: The cluster’s service range differs from cluster_svc_cidr.
What to do: Set cluster_svc_cidr back to what the cluster runs with.
[ACD-HEALTH-NODE-NOT-READY]
Cause: A cluster machine is not Ready.
What to do: Check systemctl status k3s or k3s-agent on it, or remove it from the cluster.
[ACD-HEALTH-LIST-FAILED]
Cause: The databases or volumes could not be listed.
What to do: Check the cluster API answers with k3s kubectl get nodes.
[ACD-HEALTH-DATABASE]
Cause: A PostgreSQL database cluster is not healthy: it is still being built, is switching its primary, or more than one of its instances is not ready. One instance being rebuilt is accepted, and so is one instance per machine the run is bringing back after a role change.
What to do: Inspect it with the kubectl describe command in the message.
[ACD-HEALTH-VOLUME-FAULTED]
Cause: A storage volume has no replica with usable data, and not every replica is on a machine the run joins back.
What to do: Recover it from the Longhorn UI or a backup.
[ACD-CIDR-OVERLAP]
Cause: cluster_pod_cidr and cluster_svc_cidr overlap.
What to do: Choose two separate ranges.
[ACD-BACKPLANE-SPLIT]
Cause: The machines’ cluster addresses are not all on one network, so they could not reach each other. Either a machine’s address is outside backplane_network, or, without one, a machine using a second interface for cluster traffic has an address on a different network from the others. Nothing was changed.
What to do: The message names the machine and the network. Put every machine’s cluster address inside backplane_network (correct node_ip in inventory.ini if needed), or set backplane_network to the network the machines actually share.
[ACD-CIDR-IN-USE]
Cause: A machine already uses an address or route in cluster_pod_cidr or cluster_svc_cidr.
What to do: Choose ranges no machine uses.
[ACD-ROUTING-CONFLICT]
Cause: A routing rule sends cluster traffic away from the main routing table.
What to do: Follow the message: give the conflicting rules a priority number above 50, or with manage_routes: false, set it to true or add your own lookup main rules ahead of them.
[ACD-FIREWALL-SOURCE-CONFLICT]
Cause: Another firewalld zone on a machine already holds an address range that overlaps one deploy needs to trust: the pod or service network, backplane_network, or another machine’s address. firewalld allows a range in only one zone. Nothing was changed.
What to do: Run the commands the message shows: they remove the overlapping range from the other zone. If the zone it names is deploy’s own zone under an earlier name, set firewall_cluster_zone back instead: it is locked at first install. Or set manage_firewall: false.
[ACD-FIREWALL-NAME-INVALID]
Cause: firewall_cluster_zone or firewall_public_policy is the name of one of firewalld’s own zones or policies (such as public, trusted or allow-host-ipv6), is empty or not a string, is longer than firewalld allows (17 characters for the zone, 18 for the policy), has characters other than letters, digits, - and _, or both are the same. Nothing was changed.
What to do: Choose other names in group_vars/all.yaml.
[ACD-FIREWALL-NAME-IN-USE]
Cause: A machine already has a firewalld zone or policy named like firewall_cluster_zone or firewall_public_policy, and it holds rules deploy did not create. deploy would delete those rules, so it stops instead. Nothing was changed.
What to do: Choose names in group_vars/all.yaml that nothing on the machines uses, or empty that zone or policy yourself.
[ACD-FIREWALL-HANDOVER-STOPPED]
Cause: With manage_firewall: false, deploy needs to empty its own zone and policy, but firewalld is stopped. Rules saved in a stopped firewalld would come back when it starts. If this appears after the network changes, firewalld stopped during the run, and nothing was installed on the cluster.
What to do: Start firewalld (systemctl enable --now firewalld) and run deploy again. Or run the commands the message shows, then run deploy again.
[ACD-FIREWALL-CLOSED]
Cause: With manage_firewall: false, a machine’s firewall blocks something the cluster needs: a required port is closed, or the pod or service network is not in a zone that accepts all traffic. Nothing was changed.
What to do: Run the firewall-cmd commands the message shows. See Managing the Firewall Yourself. Or set manage_firewall: true.
[ACD-BACKUP-FOLDER-CREATE]
Cause: The folder for this run’s backup could not be created.
What to do: Check that the backup folder’s parent exists and is writable, or set backup_dir in group_vars/all.yaml.
[ACD-BACKUP-FOLDER-EXISTS]
Cause: Another run started in the same second and owns the backup folder.
What to do: Run deploy again; nothing was changed.
[ACD-BACKUP-SNAPSHOT]
Cause: The etcd snapshot for the backup was not found, or more than one was.
What to do: Check the snapshot folder and the k3s log (journalctl -u k3s) on the machine the message names, then run deploy again.
[ACD-NM-PENDING-EDITS]
Cause: A network connection deploy needs to change has edits saved in NetworkManager that are not active yet. Applying deploy’s change would activate them too. Nothing was changed on that machine.
What to do: Check the pending edits with nmcli connection show <uuid>. Either undo them with nmcli connection modify, or activate them in a maintenance window with nmcli connection up <uuid>. Then run deploy again.
[ACD-CLUSTER-ZONE-MISSING]
Cause: A machine already running k3s has no acd-cluster zone or no acd-public policy (or the names you set). Creating them needs a firewalld reload, which would remove the rules k3s depends on, so deploy will not do it on a running machine. Nothing was changed.
What to do: If you changed firewall_cluster_zone or firewall_public_policy, set them back: they are locked at first install. Otherwise, in a maintenance window, one machine at a time, create them (firewall-cmd --permanent --new-zone=acd-cluster, --zone=acd-cluster --set-target=ACCEPT, --new-policy=acd-public, --policy=acd-public --add-ingress-zone=public --add-egress-zone=HOST), run firewall-cmd --reload, and restart k3s. Then run deploy again.
[ACD-NODE-UNREACHABLE]
Cause: A machine stopped answering over SSH while its host network changed, one machine at a time on a running cluster, so the machines after it were left as they were. The change itself may have cut it off.
What to do: Check that machine’s network from its console, then run deploy again.
[ACD-VERIFY-ZONE]
Cause: After changing a machine’s network, an interface is not in the firewalld zone deploy planned for it. Nothing was installed on the cluster.
What to do: Run deploy again. If the message comes back, send it to support.
[ACD-VERIFY-FIREWALL]
Cause: After changing a machine’s network, its firewall still blocks something the cluster needs, or another zone holds an address range deploy needs to trust. Nothing was installed on the cluster.
What to do: Run the firewall-cmd commands the message shows, then run deploy again. If the message comes back, send it to support.
[ACD-VERIFY-LEFTOVER]
Cause: After changing a machine’s network, deploy’s own zone or policy holds a rule it did not create, or is missing one it planned. Nothing was installed on the cluster.
What to do: Run deploy again, which removes the extra rule. Keep your own rules in other zones. If the message names a zone target or priority, run firewall-cmd --reload in a maintenance window and restart k3s (or k3s-agent) on that machine, then run deploy again. If it comes back otherwise, send it to support.
[ACD-VERIFY-ROUTING]
Cause: After changing a machine’s network, its routing rules are not what deploy planned: a cluster rule is missing, a removed rule is still active, a rule was added by hand with ip rule add, or cluster traffic uses a routing table other than main. Nothing was installed on the cluster.
What to do: Run the ip rule del commands the message shows, check with ip rule show, then run deploy again. If the message comes back, send it to support.
[ACD-VERIFY-SYSCTL]
Cause: After the network changes, a kernel network setting on a machine has another value than the deployment set.
What to do: Find what sets it (a file under /etc/sysctl.d, or a tuned profile), then run deploy again. No k3s step ran.
[ACD-JOIN-UNREACHABLE]
Cause: A joining machine cannot reach the server it joins through.
What to do: Check the firewall on both machines, that their node_ip addresses are on one network, and that reverse path filtering (net.ipv4.conf.all.rp_filter) does not drop the replies; see the message.
[ACD-GATE-DATABASE-UNHEALTHY]
Cause: After the install, a PostgreSQL database cluster did not become healthy in time. This message is followed by [ACD-GATE-FAILED], which writes the support bundle.
What to do: Wait until kubectl get clusters.postgresql.cnpg.io -A shows Cluster in healthy state, then run deploy again.
[ACD-GATE-UNHEALTHY-PODS]
Cause: After the install, pods in a critical namespace (default, kube-system or longhorn-system) were still not running after 10 minutes. The message lists each such pod with its namespace. It is followed by [ACD-GATE-FAILED], which writes the support bundle.
What to do: On a server, find the cause, fix it, then run deploy again. How depends on the pod’s namespace:
default: the platform’s own pods, which acd-admin covers. Most pods belong to an admin target, whose pods acd-admin status <target> lists with their last termination and recent warnings. Find the pod’s target, then read acd-admin logs <target>. For a pod that belongs to no target, such as the Kafka operator’s, use the kubectl commands in the next item.kube-system and longhorn-system: the cluster’s own components and the storage layer, which acd-admin does not cover. Use the commands in the message: kubectl describe pod -n <namespace> <pod> and kubectl logs -n <namespace> <pod>.
[ACD-GATE-RELEASE-STATUS]
Cause: After the install, the Helm release is not deployed. This message is followed by [ACD-GATE-FAILED], which writes the support bundle.
What to do: Find the cause with the helm status command in the message and acd-admin status, fix it, then run deploy again.
[ACD-GATE-FAILED]
Cause: The final health check failed. It follows the message that names the failing check.
What to do: Read that earlier message, and send /etc/acd/deploy/support-bundle-acd.tar.gz to support.
Getting Help
When the final health check fails ([ACD-GATE-FAILED]), deploy writes /etc/acd/deploy/support-bundle-acd.tar.gz, with the run’s log, its decision record and what it read from each machine. Send it to AgileTV support.
When a run stops earlier, send support these files from /etc/acd/deploy instead:
deploy.logdecision-record.json- the
probe/ folder
12 - Next Steps
Securing the administrator account, adding users, and other first tasks
Overview
With the cluster installed, finish these tasks before you let users on to the system. They are done in the web interfaces, not with deploy.
Every interface is reached under the main manager hostname, the first entry of manager_hostnames. Signing in under any other name, a machine’s IP address included, fails.
| Interface | Address |
|---|
| GUI | https://<manager hostname>/gui/ |
| Zitadel Console (users and roles) | https://<manager hostname>/ui/console |
| Grafana (dashboards) | https://<manager hostname>/grafana/ |
| API | https://<manager hostname>/api/v1/ |
Step 1: Sign In to the Zitadel Console
Zitadel is the manager’s identity service: every user account and role lives there.
- Open
https://<manager hostname>/ui/console. - Sign in with the default administrator: login name
admin@zitadel.<manager hostname>, password Password1!. The console also accepts the account’s email address, admin@agiletv.dev. - If you are asked to set up multi-factor authentication (MFA), skip it. MFA is not supported in this release, and setting it up can lock you out of the account.
Step 2: Replace the Default Administrator
The default credentials are published, so replace them before the system is reachable by anyone else.
- Create your own administrator account, as in Step 4, and give it the administrator roles. See Zitadel’s administrator documentation for the roles.
- Sign out, and sign in with the new account to check that it works.
- Disable or delete the default
admin account.
Zitadel sends email to verify addresses and reset passwords. Without an SMTP server, those features do not work.
- In the Zitadel Console, open Settings > Default Settings.
- Enter your mail server’s host, port (typically 587 or 465), user name and password, and the sender address, such as
noreply@example.com. - Save.
Step 4: Add Users
In the Zitadel Console, open Users > Add User.
Enter a username, first and last name, and email address.
Known issue: The username must match the local part of the email address, the part before the @. For foo@example.com, the username must be foo. Otherwise Zitadel can block sign-in with the full email address.
Without SMTP, tick Email Verified and set an initial password. Otherwise the account is not enabled.
Select Create User, then give the user their username, temporary password, and the console address. They are asked to change the password at first sign-in.
Assign the user’s roles. For Grafana’s roles, see Grafana Authentication.
Users sign in to the GUI with their login name, <username>@zitadel.<manager hostname>, not their email address. For more on managing users, see Zitadel’s user management documentation.
Step 5: Open Grafana
Open https://<manager hostname>/grafana/ and select Sign in with Zitadel. The dashboards are installed with it. See Metrics and Monitoring.
Step 6: Connect Your CDN Directors
Each CDN Director in external_directors is configured through the manager at https://<manager hostname>/confd/<name>/. Each one is known to Grafana as <name>.external, for example director-1.external. Connecting a Director to the manager is described in the CDN Director documentation.
Make sure your network’s firewall lets the Directors reach Kafka on every machine, and nothing else does: see Kafka Ports.
Step 7: Record Your Installation
Keep a record, off the cluster, of:
- The Zitadel master key, from Step 11 of the Quickstart.
- Your TLS certificate and key, and its expiry date.
- Your MaxMind databases.
- A copy of
/etc/acd/deploy. - The machines, their addresses, and the manager hostnames.
Further Reading